- Forum posts: 35
Jun 23, 2016, 10:57:46 AM via Website
Jun 23, 2016 10:57:46 AM via Website
Animated GIFs have been around for almost two decades, allowing users to create and share simple animations online. You can find lots of them from blogs and social networking sites. But where do they come from? Where do they go? Can you make your own?
Here is an article to show you how to make gifs on Mac in two different ways with two different tools, which are Any Video Converter Ultimate for Mac and Photoshop. Of course, you can simply choose the one you prefer. If you also want to learn how to do it on Windows PC, you can refer to tutorial on how to convert video to gif.
Get prepared:
- Pick the software you prefer and download it on your Mac
Adobe Photoshop -- Leading photo editing software.
If you are a professional Photoshop user, you can make gifs easily following this tutorial. However, if you are new and do not have it on your Mac, you may find it a bit difficult. And if you can not afford it, we suggest you download the demo version.
Any Video Converter Ulitmate for Mac -- The one we highly recommend.
It can not only make gif from video clip easily, but also help you download Youtube/Facebook/Dailymotion videos you love and record any online video from any sites. You know what it means? You can get any videos you love from Internet and convert them to GIFs!
2. Pick a video and find a GIF-Worthy Moment
You can use any video file. You can choose an existing video file on your hard disk, or make a video yourself with your iPhone, iPad, or digital camera.
The best GIFs are small clips that show some sort of reaction: an eye roll, an epic fail, nature's funny moments, something cool in science, etc. So find the very moment you love.
Start Making GIFs:
With Any Video Converter Ultimate for Mac
Step 1. Load Video File and Create a Video Clip.
Before you work with the video, it's a good idea to trim the video down to the GIF-worthy moment you've already pin-pointed. Otherwise, you will have to work with the whole video file. It will be annoying when your video file is large.
Any Video Converter Ulitmate for Mac can clip your video with ease.
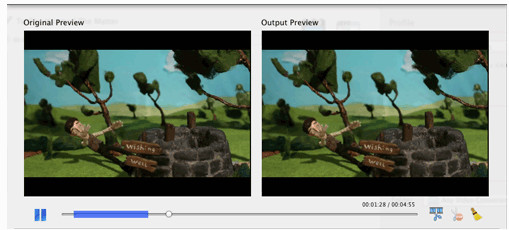
1. Add video file to the program, choose the video file you want to clip. Then click "Edit Effect" icon edit effect, and in the popup box, the video will be played automatically.
2. When the video is playing, click "Start" icon start clipping to clip the video based on time by blue marker.
Note: When the video is paused, it doesn't support clip.
3. And then click the available "End" icon end clipping to complete the clip.
Step 2. Set profile to GIF Animation.
Click the required profile in Profile drop list on the main interface. Make sure to select GIF Animation.
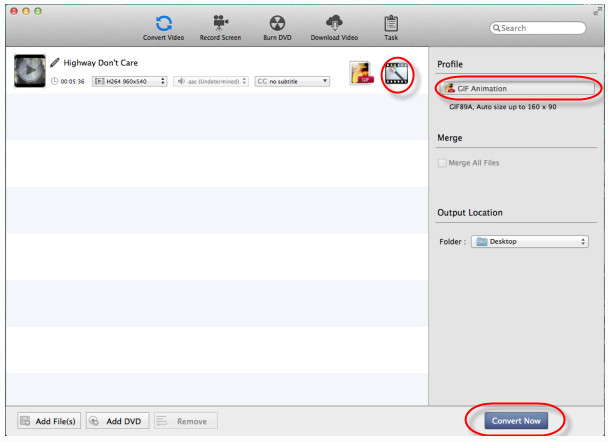
Step 3. Start the Conversion.
Click the Convert Now button to start converting. Meanwhile the video clip on the list is added to the Task- Pending- Converting list
Step 4. Finish the Conversion and share your GIF.
After the conversion is done, it will be deleted from Task- Pending- Converting list, and then added to Task- History- Converted list. You can find your created GIF file here.
Finally, show off to your friends. Video GIFs can be a lot of fun, and you’ll certainly want to share them online with your friends and family.
With Photoshop
Step 1. Create a Video Clip.
Trim the source video file (the thing you want turned into an animated GIF) into a very short segment. Two or three seconds, max. If you don't do this, your file will be large and unwieldy. iMovie is an easy, free way to trim video.
Step 2. Import the Video in Photoshop.
Once you've opened Photoshop, go to File > Import. Select "Video Frames to Layers," and a small player will pop up in which you can select how much of the video you want to work with.
Step 3. Adjust Quality Settings.
The better your GIF looks—the less noise and compression junk in your image, the bigger the file. Hit File > Save for Web and mess around with some settings.
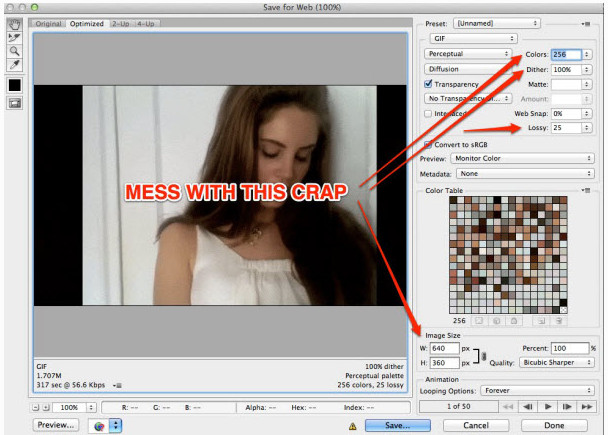
- You'll want to keep the "Colors" setting as high as possible. Knocking it down means the GIF is created using fewer colors mixed together, which makes it look less and less like the original video. This saves a lot of space, though. Try to stick with 256, going down a level only as a last resort.
- Dither: The higher the better. Lower means crappy looking, but smaller file.
- Lossy: Like dither, only reversed. Higher means a worse, smaller file. Slide it around until you hit a sweet spot.
Step 4. Save Your GIF.
The hard part may be over, but it's important that you prep and save your GIF properly. Select File > Save for Web (not the same as "Save"). A menu will pop up, complete with a few musts.
Depending on which version of Photoshop you're using, you might need to specify that this file is animated. If there's a box for that, make sure it's checked. Also, make sure the file is saved as a GIF.

Recommended editorial content
With your consent, external content is loaded here.
By clicking on the button above, you agree that external content may be displayed to you. Personal data may be transmitted to third-party providers in the process. You can find more information about this in our Privacy Policy.