How to root a Google Pixel

We’ve rooted a Google Pixel. Bootloader, encryption, new partitions, and security systems all present new challenges for modders. Here, we'll show you the new process for rooting Pixel phones, and explain what you will need to consider with this system.
Both SuperSU and TWRP are now available for the Google Pixel. So we immediately unlocked the bootloader, changed the recovery and flashed the SuperSU. The complete process is somewhat similar to the one we know from its predecessor, the Nexus 6P. One common does feature remain: you'll lose all your stored data. So, backup now to avoid disappointment later.
- CyanogenMod: updates and new features
For this review, we used a Linux system. This eliminates the hassle of finding the right drivers and updating the ADB manually. If you are using Windows, we recommend you prepare yourself by reading our article on installing ADB drivers and tools.
The next steps are still quite similar to those from the Nexus 6P. The bootloader will also opened with two steps. First, enable OEM unlocking in the Developer Options. Then you'll need the new fastboot command: [sudo] fastboot flashing unlock.

Custom recovery: flashing TWRP on the Pixel
The first step successful modding is to change the recovery. Only a custom recovery will allow you to upload ZIP files, which is needed for you to install SuperSU properly. At the moment, TWRP is available in a functional and stable alpha version, which is suitable for rooting the Pixel.
Go to the computer where you have the ADB tools installed. Download the TWRP for Pixel or TWRP for Pixel XL from the author’s website. Now for the new part: you'll need both the ZIP and the IMG files for the first time. The IMG file will be used directly as an external boot image.
- Copy the ZIP files on a USB stick.
- Restart the Pixel and hold down the lower-volume button (the lower half of the volume rocker) to enter the bootloader/fastboot mode.
- Open an input prompt on the PC.
- Execute the command:
[sudo] fastboot boot [path/to/twrp.img]
sudo is for Linux users. You can avoid [path/to/] by changing the TWRP.img in the ADB directory (Windows) or globally defining adb and fastbook (Windows) and in the command line via cd, input the path where the TWRP image is located.
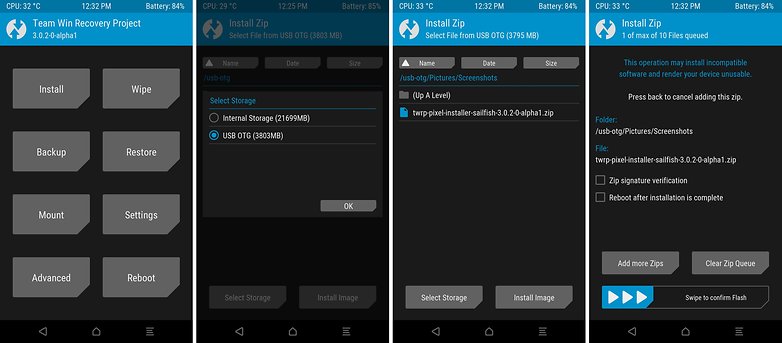
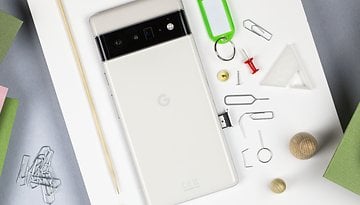
After entering the command, the Pixel is booted in TWRP. You will receive warnings about various things, but you have to activate writing rights by swiping right with the bar. You'll then see the main menu. There, you tap on Install and then on Select Storage. Now you get the OTG adapter from your Pixel’s box (picture above), insert it into the Pixel, and at the other end, insert the USB stick with the ZIP file. You should then select the stick, navigate to the appropriate directory, and import the TWRP recovery.
There are many reasons for this new level of aggravation. The normal fastboot flash recovery recovery.img does not work with the Pixel, as there is no recovery partition. Additionally, installing the ZIP file from the file system of the smartphone does not work because TWRP cannot yet decrypt the files. Maybe things will change in the future and it will become a bit more user-friendly again.
Next - return to the main TWRP screen, then click on Reboot and then on Recovery. You should now boot directly into the TWRP recovery. The connection to the USB stick or computer is no longer required. If it didn't work, you can restore the Pixel to its original state by using the factory images.
Root a Pixel or Pixel XL
If you can boot your Pixel into TWRP recovery without a PC, then the hard work is already over for you. SuperSU will be installed the same way as the TWRP.zip. The corresponding SuperSU.zip should be downloaded exclusively from the author, Chainfire. Copy the file to the USB memory stick and connect it to the OTG adapter for your Pixel. Boot into the recovery, select the OTG memory, install the ZIP and restart.
Root. And further?
SuperSU will be in your app overview after the first reboot. We’ve prepared a list of good root apps for you. They should also solve the newly-created problem of software updates. Automatic OTA images no longer work, so you'll need to install FlashFire from Chainfire, the author of SuperSU. You will also get the necessary OTA images for Pixels on Google. You can follow the developments at TWRP and Chainfire, so you won’t be unpleasantly surprised by any updates.
Have you installed a root on your Google Pixel? Let us know about it in the comments.


Concise and informative article - thanks!